Abstract
Keeping your data safe is hard. Keeping your data safe and easy to use among a multitude of devices and services is even harder. Triple Sec is a KISS security setup scheme for your MacBook, iPhone, and web services that is easy to use and relatively hard to break.
It’s based on the idea of using a combination of a random 3-4 word passphrase and a 6-digit PIN, a password manager and TouchID/FaceID devices.
The scheme allows regaining access to all of your data even in case of losing all of your devices, or in case of your death, leaving your digital legacy to your loved ones.
Desired properties
Easy to use
Security at the expense of usability comes at the expense of security
Nuff said.
Lowest amount of memorized information
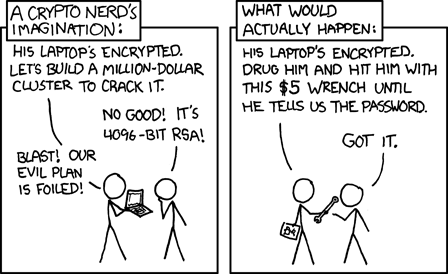
Humans are notoriously bad at memorizing long strings of random characters. We are good at remembering short phrases and making up stories about them.
This classic XKCD is a good illustration of the problem

No single point of failure
Duh. Any device loss must not compromise your security or lead to sensitive data loss.
Cross-platform
The scheme must work on any mobile, desktop, and web platform.
Disaster recovery
Even if every hardware item you own is lost, you can still regain access to everything. Imagine an act of God of your dislike. You’re fleeing from rashists in Ukraine or Syria. There is a fire in your house. You get the point.
Legacy
-
Family and friends of your choice can access all your info in case of emergency or after your death
-
Any of them can be safely revoked from access to anything
-
If their devices are compromised, an attacker won’t be able to access your info
Really Important Info security
You should be able to securely store some Really Important Info that you want to keep extra safe. For example, you have some important PGP keys, crypto wallets etc. Or some passwords you don’t want to be in your Bitwarden, like your bank account or Google Account passwords.
-
Really Important Info can’t be accessed even when the laptop/phone is fully compromised
-
Really Important Info can’t be accessed even when your primary email/Bitwarden is compromised
-
Really Important Info can’t be accessed even when your 3rd parties are compromised
-
Plausible deniability. You can store Really Important Info in a separate vault that is not accessible to your family and friends. They can’t even know that you have such a vault.
Minimum software/hardware
Prefer well-known, well-tested, well-supported open-source software. Prefer to use Apple hardware as they have a good reputation for security and privacy.
Scheme overview
Assumptions and prerequisites
-
AES256, SHA256 are secure
-
FaceID and TouchID are secure
-
iPhones ≥ 7 are secure
-
MacBook FileVault2 is secure
-
Bitwarden is secure
-
VeraCrypt is secure
-
You have several 3-rd parties who can identify you and will cooperate
-
Your significant other is not an evil psychopath
-
You are not a subject of state-level attack
-
You use iPhone ≥ 7 with TouchID/FaceID
-
You use a MacBook with a T2 security chip
-
You have a Google account
-
Your MacBook and iPhone are not hacked at the time of setup
TL;DR
-
Generate a random 6-digit PIN and memorize it. That’s your phone PIN and your SIM PIN.
-
Generate three random words using EFF Dice or Diceware. Combine with the PIN and memorize the passphrase. That’s your Bitwarden Master Password.
-
Take a word and combine it with the PIN. That’s your laptop password. You MAY store it in Bitwarden.
-
Use Bitwarden to generate strong passwords and TOTP 2FA codes for all your services.
-
Store your sensitive info in Bitwarden.
-
Store your Really Important Info in a Google Drive/iCloud synced VeraCrypt volume.
-
PIN 984073
-
Words:
cakeropingvocation -
Bitwarden Master password:
cake984073ropingvocation -
Laptop password:
vocation984073
One good in-memory-only password protects all your other passwords, TOTP 2FA, Recovery codes, etc.
Use Bitwarden Password Generator to create strong, secure passwords or passphrases. Those are encrypted with a strong encryption algorithm and synced securely between your devices.
And you don’t need to enter your PIN, laptop password and Bitwarden password very often thanks to TouchID/FaceID.
Passwords security analysis
6-digit PIN is ~20 bits of entropy, 3 Diceware words give another ~39 bits of entropy, and a random PIN position provides another 2 bits of entropy. Thus, the scheme gives roughly 60 bits of entropy for the Bitwarden Master Password.
Bitwarden uses 100,000 iterations of PBKDF2 with HMAC-SHA256 to derive the encryption key from the Master Password. Assuming an attacker can compute PBKDF2-SHA256 with 1 GiOps/s (see [pbkdf2]), 60 bits of entropy is enough to resist brute-force attacks for about 2 million years.
const dicewareDictionary = 7776; // 6^5
const dicewareWords = 3;
const dicewareBits = Math.log2(dicewareDictionary ** dicewareWords);
const pinLength = 6;
const pinBits = Math.log2(10 ** pinLength);
// [1] word1 [2] word2 [3] word3 [4] – 4 places to put the PIN
const permutationBits = Math.log2(4);
const entropyBits = Math.floor(dicewareBits + pinBits + permutationBits);
const pbkdf2Sha256PerSecond = 1e9; // 1 GH/s
// Bitwarden uses 100,000 iterations of PBKDF2 with HMAC-SHA256
const iterations = 100000;
const pwdPerSecond = pbkdf2Sha256PerSecond / iterations;
// on average an attacker needs to try half of the passwords
const numTries = 2 ** (entropyBits - 1);
const seconds = numTries / pwdPerSecond;
const secondsInYear = 365 * 24 * 60 * 60;
const years = seconds / secondsInYear;
console.log('Password Entropy: ' + entropyBits + ' bits ')
console.log('Estimated time to brute-force: ' + years + ' years')
// outputs:
// Password Entropy: 60 bits
// Estimated time to brute-force: 1827945.0542346002 years
iPhones and MacBooks with T2 chips mitigate password brute-force attacks by requiring a longer delay between password attempts on the hardware level. iPhone can be configured to wipe all the data after 10 unsuccessful attempts.
Even with the recently discovered flaw, MacBooks' passwords can be tried at 15 passwords per second. With 232 passwords to try, on average, it would take about 9 years to brute-force, making it impractical.
Why Bitwarden?
Bitwarden is open-source, cross-platform, cross-browser, free, and has a good reputation. The code is audited, and the company is trustworthy.
It supports storing TOTP 2FA, TouchID/FaceID unlocking, allows Emergency Access, and it’s easy to use. It is well-integrated with iOS and macOS.
Apple Keychain is not open-source, and it’s not cross-platform. It’s not integrated with the Firefox browser.
1Password is a good alternative, but it’s not open-source, and it’s not free. Anyhow, this scheme can be easily used with 1Password as well. You don’t need to switch to Bitwarden if you already use 1Password. The same rules apply.
KeyPassXC doesn’t work on iPhones.
Digital legacy and disaster recovery
If you want to leave your digital legacy to your loved ones, you can do it with Bitwarden Emergency Access.
If you have some Really Important Info and you store it in a separate vault, you can leave the vault password to your loved ones.
You store your Secure Vault password in an encrypted file that you share with your loved ones.
The encryption password is derived from your Master Password. You store it in your Google Digital Legacy Plan along with instructions on accessing your Secure Vault.
In case of your death, your loved ones will receive a notification from Google and can access your encrypted file with your Secure Vault password.
If you lose all your devices, you can ask your loved ones to give you the encrypted file with your Secure Vault password, derive the password from your Master Password, and access your Secure Vault.
If you stop trusting one of your loved ones you can revoke their access to your encrypted file by changing a version of the derived password, re-encrypting the file and sharing it with your loved ones again.
Don’t forget to update your Google Digital Legacy Plan accordingly.
Pros
-
remember only 3 words and 6 digits, easy
-
super easy to use, rarely need to enter your PIN, laptop password or Bitwarden password
-
loss of any device is neither a security nor data loss concern
-
can recover all your info from nothing just knowing your Master Password
-
Bitwarden password is good enough to resist brute-force attacks in case the vault is breached (like in LastPass situation)
-
laptop password is good enough to resist brute-force attacks in case the laptop is stolen
-
you can share your PIN and even your laptop password with your significant other, and they still can’t easily access Master Password-protected items in Bitwarden. They can if they know what they are doing, though.
-
in case you distrust your significant other – change your PIN on your phone, laptop, and Bitwarden.
Cons
-
you are screwed if someone shoulder-hunts or records your Bitwarden password, unless you set up 2FA in Bitwarden. Watch your back when you need to enter the password.
-
you are screwed if an attacker has access to your phone or laptop and knows their passwords
-
you are screwed in case of your spouse is malevolent and knows the scheme
-
you are mostly screwed if the laptop is rooted or even keylogged
-
you don’t want to store crypto wallet seeds in Bitwarden with this setup, unless you are accepting the risk of losing your crypto
Setup guide
Passwords and PINs
-
Generate a random 6-digit PIN and memorize it. That’s your phone passcode.
-
Generate 3 random words using Bitwarden Password Generator, EFF Dice, Diceware.
Or use the random words generator below. It uses Web Crypto API of your browser to generate random numbers.
Random PIN:
Random words:
Master Password:
Laptop Password:
-
Combine with the PIN and memorize the passphrase. That’s your Bitwarden Master Password.
-
Take a word and combine it with PIN. That’s your laptop password. You MAY store it in Bitwarden.
iPhone setup
-
Setup iPhone passcode to be PIN: Settings → Face ID & Passcode
-
Delete all existing TouchID fingerprints or FaceID data and set up new ones: Settings → Face ID & Passcode → Reset Face ID
-
Enable SIM PIN, set it to the first 4 digits of your iPhone PIN: Settings → Mobile Data → Carrier → SIM PIN
This way, we protect your phone from SIM hijacking and SIM swap attacks. An attacker can’t use your phone for 2FA via SMS if they don’t have your PIN.
-
Enable Auto-Lock: Settings → Display & Brightness → Auto-Lock. Set it to whatever you are comfortable with but 'Never'.
-
Enable wiping your data after 10 wrong attempts if you want to be extra secure: Settings → Face ID & Passcode → Erase Data.
-
Set up a security question/password with your mobile service provider to avoid SIM hijacking. Store it in Bitwarden.
-
Disable all notifications on the locked screen. Settings → Notifications → Show Previews → When Unlocked
Bitwarden setup
-
Install Bitwarden app on all your devices and Bitwarden extensions for your web browsers. Enable TouchID/FaceID integration.
You MAY enable 2FA for your Bitwarden account. It’s not necessary, but it’s good practice. Don’t use TOTP. Use email, YubiKey, FIDO2, and Recovery Code instead.
-
Setup Bitwarden Unlock with Biometrics option.
-
Optionally, setup 2FA for your Bitwarden account. It’s not necessary, but it’s good practice. Don’t use TOTP. Use email, YubiKey, FIDO2, and Recovery Code.
-
Setup Log in with Device for your iPhone.
-
Import all your passwords from other password managers to Bitwarden. Import Data
Store all passwords, TOTPs, Recovery codes etc., in Bitwarden.
Use Bitwarden Password Generator to generate secure passwords or passphrases.
Enable TOTP 2FA everywhere where there is such an option: Google, Facebook, Twitter, Instagram, banking, crypto exchanges, mobile providers etc.
If you use Google Authenticator, Duo, Authy or another, you may want to migrate to TOTP 2FA in Bitwarden to simplify things. It’s OK.
MacBook setup
-
Enable FileVault2 encryption: System Settings → Privacy & Security → FileVault.
-
Store the hard drive Recovery code in Bitwarden.
-
Enable TouchID
-
Enable Firewall
-
Set up PAM with TouchID to avoid entering the laptop password on the
sudocommands.
You’ll have to enter your laptop password only after a reboot. Avoid doing it with someone watching or near a camera.
Unlock Bitwarden with TouchID, and avoid typing your Master password. Login to Bitwarden Web Vault using your iPhone when needed.
Use TouchID for sudo, ssh, payments, FIDO2, etc.
A helpful tool is Secretive – an app for storing and managing SSH keys in the Mac T2 Secure Enclave.
Disaster recovery
|
Note
|
Ideally, this should be done on a USB-booted Linux, like Kali Linux or Tails Linux. But, at the time of writing, all of them have issues with MacBooks with T2 chips: the keyboard and trackpad don’t work. |
-
Create a
Readme-$version.txtfile that contains the following information:-
Master Password
-
PIN
-
Google Account Backup Codes
-
Bitwarden Backup Code
-
iCloud Backup Code
-
VeraCrypt Passwords
-
Other passwords not stored in Bitwarden
-
-
Derive a password for the
Readme.txtfile from the Master Password.JavaScript code to compute the
DerivedMasterPwdconst version = 0 const pwd = 'cake984073ropingvocation' const salt = '984073' const iterations = 100000 + version const textEncoder = new TextEncoder("utf-8"); const passwordBuffer = textEncoder.encode(pwd); const importedKey = await crypto.subtle.importKey("raw", passwordBuffer, "PBKDF2", false, ["deriveBits"]); const saltBuffer = textEncoder.encode(salt); const params = {name: "PBKDF2", hash: 'SHA-256', salt: saltBuffer, iterations: iterations}; const derivation = await crypto.subtle.deriveBits(params, importedKey, 32*8); function buf2hex(buffer) { // buffer is an ArrayBuffer return [...new Uint8Array(buffer)].map(x => x.toString(16).padStart(2, '0')).join(''); } console.log(buf2hex(derivation));Master Password:
PIN:
Version:
Derived Master Password:
-
Encrypt Readme-$version.txt with
DerivedMasterPwdusing AES256 and GPG.gpg -c --cipher-algo AES256 Readme-0.txt
-
Transfer
Readme-0.txt.gpgvia Signal with auto-delete to trusted 3-rd parties. Ask to verify your identity upon requesting the file. -
Remove
Readme.txtandReadme-0.txt.gpgfrom the laptop! -
Make a Plan for your Digital Legacy
Choose who to notify & what to share.
-
Store the
DerivedMasterPwdin your Google Digital Legacy Plan.Example 3. Example noteI guess I’m dead now.
Decrypt Readme-0.txt.gpg with
[put DerivedMasterPwd here]to get my passwords.gpg -d --cipher-algo AES256 Readme-0.txt.gpg
See-ya!
Really Important Info storage
You may want to store some Really Important Info in a really secure way. For example, your crypto wallet seeds, PGP keys, Bitwarden Recovery Code etc.
You’ll need VeraCrypt. It’s a free open source disk encryption software for Windows, Mac OSX and Linux.
-
Create a
SecurePIN(6 digits),VeraCryptNormalPasswordandVeraCryptHiddenPassword.Use the random generator.
Use a permutation of your
Master Password,PIN, andSecurePIN.Example 4. Don’t use these in real life-
SecurePin:
850817 -
VeraCrypt Normal Password:
vocation984073 -
VeraCrypt Hidden Password:
trimmer850817erasedeligible
-
-
Create a VeraCrypt volume with a hidden volume synced to Google Drive or iCloud Drive.
-
Store seeds, PGP keys, Readme.txt etc., on your hidden volume
-
Store something plausible on a normal volume
-
In case you are forced to reveal the password to your VeraCrypt volume – you reveal your
VeraCryptNormalPasswordand deny the existence of the hidden volume. See Hidden Volume and Plausible Deniability.
|
Note
|
Ideally, you do this on a USB-booted Linux, but see a note about that. |
Crypto wallets and seeds
Use a hardware wallet for storing crypto assets you don’t want to lose. Ledgers is a good choice. Others are Trezor and Jade.
For a hardware wallet, either use your phone PIN or generate another 6-digit random SecurePIN, depending on your paranoia.
Store your seed and SecurePIN:
-
in
Readme.txtfrom the Disaster recovery -
or store the seed in the hidden volume of your Really Important Info storage.
-
or even better, store the seed on a separate old offline iPhone with the
SecurePINas a passcode.
Threats
A service password is hacked
Just change your password for that service. You are using 2FA, right?
Laptop is stolen, the password is not known to an attacker
An average thief can’t access anything to get to your data.
An advanced attacker can tamper the TouchID,
do sudo su - with TouchID and gain admin privileges.
Then you are mostly screwed. Your Really Important Info storage is safe, though.
Laptop is stolen, laptop password known to an attacker
-
Attacker CAN access your Bitwarden, Gmail, TouchID/FIDO2, Github, Social Media, Messengers, iCloud, Google Account, etc.
-
Attacker CAN access and unlink the laptop in iCloud by using TouchID and Safari browser to log in to iCloud. I don’t know how to prevent this.
-
Attacker MAY steal your Google account if you use iCloud email as a backup email and TouchID as 2FA. I don’t know how to prevent this.
-
Attacker CAN NOT access Really Important Info storage as he doesn’t know the password
iPhone is stolen
Assuming your PIN/password is unknown to the attacker, you are safe. Your SIM card is safe, too.
Google banned you
Access a local copy of your Really Important Info storage data on one of your devices. You are fine.
Encrypted data is lost
Restore from backup or get it from Google Drive/iCloud on another device. You are fine.
SIM card is copied
You avoid SMS 2FA as much as possible, don’t you? You are fine then. Just restore your SIM card at your carrier office.
A third party is no longer trusted
-
Increment the version of your Readme-$version.txt
-
Derive a new
DerivedMasterPwdwithMasterPassword,PINand a new version using the algorithm from Disaster recovery -
Re-encrypt your
Readme-$version.txtwith it. -
Share it with your trusted 3rd parties.
-
Update your
DerivedMasterPwdin your Google Digital Legacy Plan.
Now the distrusted 3rd party can’t access your secrets after your death.
The laptop is rooted
You are mostly screwed. Your Really Important Info is safe if you only access it on a USB-booted Linux or a specific air-gapped device. Also, don’t store Readme.txt.gpg on your laptop or in the cloud.
Targeted cyber attack, social engineering
That depends. You can be screwed if you are targeted.
Non violent intrusion
If you are forced to reveal your secrets by law, your Really Important Info is OK. See Plausible Deniability.
Kidnapping, violence, thermorectal cryptanalysis
You are screwed.
Use other means for storing your crypto.
Spouse malevolence
Assume that your spouse knows your PIN/laptop password.
They can access your Bitwarden, Gmail, TouchID/FIDO2, Github, Social Media, Messengers, iCloud, Google Account, etc., by adding their TouchID/FaceID to your devices.
They can find your DerivedMasterPwd, Readme.txt.gpg, and access your SecureStorage. You are screwed.
If you suspect your spouse to become malevolent, you can change your iPhone PIN and your laptop password and reset all TouchID/FaceIDs. That should suffice.
Scenarios
You have lost everything
-
Ask a 3rd party for
Readme-$version.txt.gpg -
Compute
DerivedMasterPwdfromMasterPassword,PINandversionusing the algorithm from Disaster recovery -
Login to Bitwarden with your Bitwarden Master Password and Bitwarden Backup Code if needed
-
Login to iCloud using iCloud Backup Code
-
Login to GMail using Google Account Backup Codes
-
Restore crypto wallets from seeds, PGP keys etc., from your VeraCrypt volume on Google Drive
You have lost everything but iPhone
-
Do the checklist of a stolen laptop
-
Restore wallets from seeds, transfer crypto
-
Erase all stolen devices
Lost laptop checklist
-
Login to Bitwarden Web Vault
-
Go to Account Settings
-
Deauthorize your laptop session
-
Change Bitwarden password
-
Login to iCloud
-
Settings → Sing Out of All Browsers
-
Find Devices → Laptop → Erase Mac
-
Login to Google
-
Manage Account → Your devices → Sing out
-
2FA → Remove TouchID key
Lost iPhone checklist
-
Login to Bitwarden web vault
-
Go to Account Settings
-
Deauthorize session
-
Change Bitwarden password
-
Login to iCloud
-
Settings → Sing Out of All Browsers
-
Find Devices → iPhone → Erase iPhone
-
Login to Google
-
Manage Account → Your devices → Sing out
-
Banks as well
Death or emergency
Spouses can access a laptop/phone, access Bitwarden/Gmail. Leave an Emergency Note and tell them to look it up in an emergency.
Otherwise, your trusted 3rd parties receive your legacy note and can access the Readme-$version.txt.gpg with DerivedMasterPwd and then access your Really Important Info storage.
Spouse distrust
-
Change iPhone PIN
-
Remove all iPhone FaceIDs and set up a new one
-
Change the laptop password PIN to the new iPhonePIN
-
Revoke Bitwarden Emergency Access
-
Revoke Google Inactivity Access
-
Revoke iCloud Recovery Account
3rd party distrust
-
Increment the version of your
Readme-$version.txt(e.g.Readme-1.txt) -
Derive a new
DerivedMasterPwdwithMasterPassword,PINand a new version using the algorithm from Disaster recovery -
Re-encrypt your
Readme-$version.txtwith the newDerivedMasterPwd -
Share it with your trusted 3-rd parties
-
Update your
DerivedMasterPwdin your Google Digital Legacy Plan
The distrusted 3-rd party can’t access your secrets after your death or inactivity.
You forgot your Master Password or SecurePIN
-
Go to your Google Digital Legacy Plan and get your
DerivedMasterPwdfrom there. -
Ask your trusted 3-rd parties to give you the
Readme-$version.txt.gpgfile. -
Decrypt it with
DerivedMasterPwdand get yourMasterPasswordandPIN.gpg -d --cipher-algo AES256 Readme-0.txt.gpg
Glossary
- KISS
-
Keep It Simple Stupid
- TOTP
-
Time-based One-time Password
- 2FA
-
Two-factor Authentication
Bibliography, useful links, and resources
-
[triplesec] This page source https://github.com/nau/triplesec
-
[TSpdf] TripleSec PDF https://github.com/nau/triplesec/raw/master/TripleSec.pdf
-
[crypto] https://medium.com/@vincentbounce/cryptos-storage-transmission-the-safest-method-314560032872
-
[pbkdf2] Acceleration Attacks on PBKDF2
-
[EFF] EFF Basics